
This fishtail braid hair tutorial is the 3rd tutorial in our 4 part braid series from the lovely Jesse of Our Labor of Love, Alison Brislin, and Kelly Shew. I remember being young and asking my mom to put my hair in a fishtail braid, so I’m excited to have a little guide to use on my own little girl now!
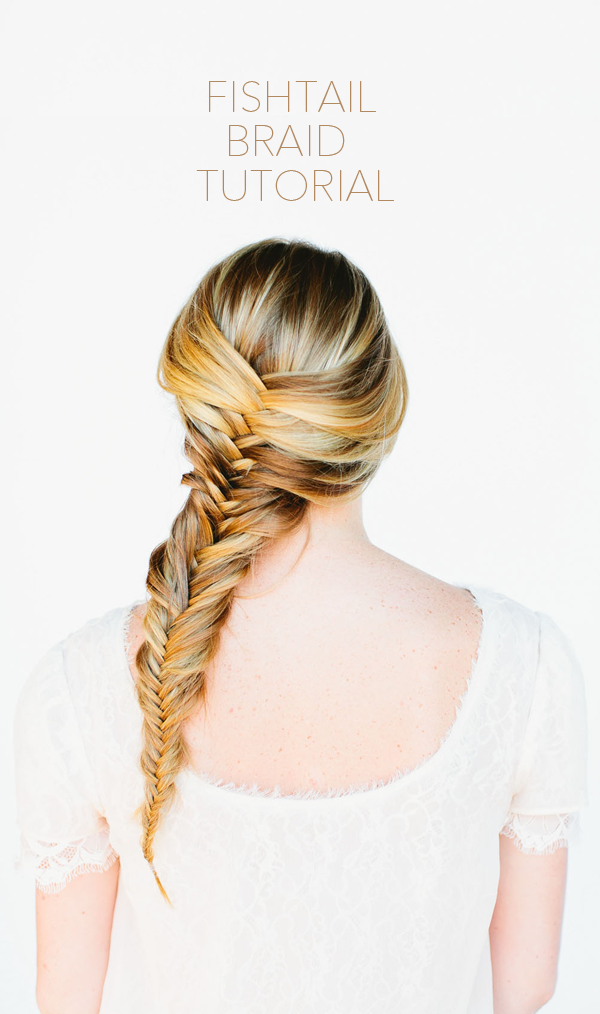
Fishtail Braid Tutorial
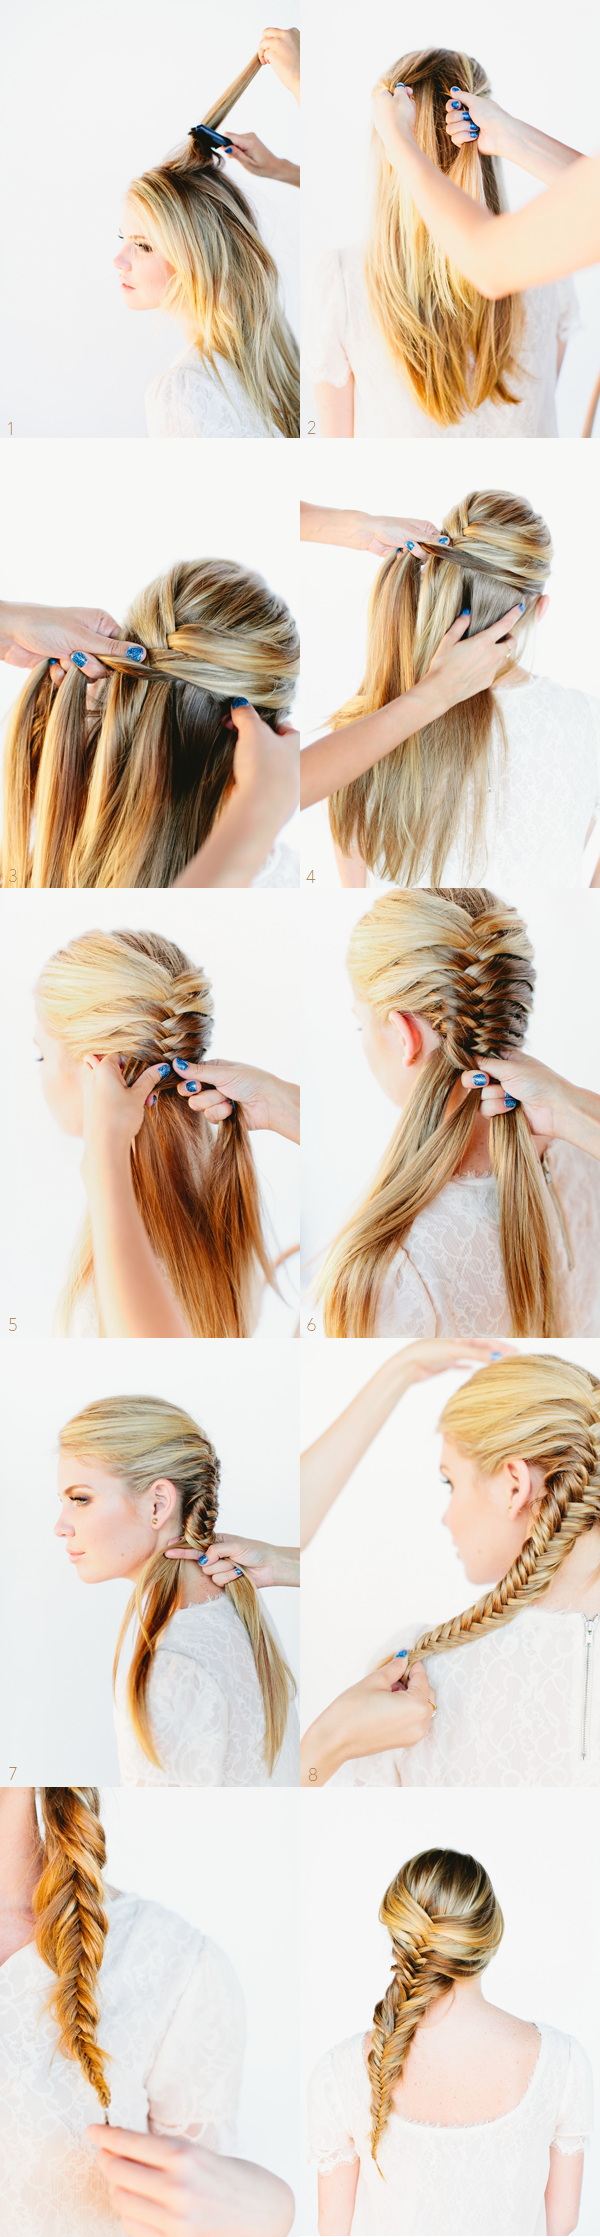
1. Backcomb/tease the crown of your head. This makes the hair “sticky” for starting the fishtail.
2. Gather a small handful of hair from the back center of the head and separate the hair into two sections.
3. + 4. Take a small strand of hair from the right section, pull it back and cross it over to join the left hair section.
5. + 6. Take a small strand of hair from the left section, pull it back and cross it over to join the right hair section.
7. Repeat these steps all the way down the back of the head. Continue throughout the “tail”.
8. Secure with hair tie. Fishtails looks beautiful a little disheveled. To achieve this look gently pull apart/loosen the braid. It’s ok if it’s uneven or little pieces falls out. Gives the fishtail a youthful, messy ease.
Extra Tips
– You should brush your hair before braiding. Knots and tangles make it hard for the person braiding your hair. Might also hurt a little bit!
– Part on your natural side. Adjust instructions according to your part.
– Day old hair is best. A little grit is good for braids as they hold-up better. Clean hair is too slippery.
– These tutorials are written for someone to braid your hair, not intended for self-braiders. Unless you are really clever and talented!
Photography: Jesse of Our Labor of Love // Hair: Alison Brislin // Makeup: Kelly Shew
To see more ideas for wedding hairstyles for long hair, check out french braid bun and waterfall braid!