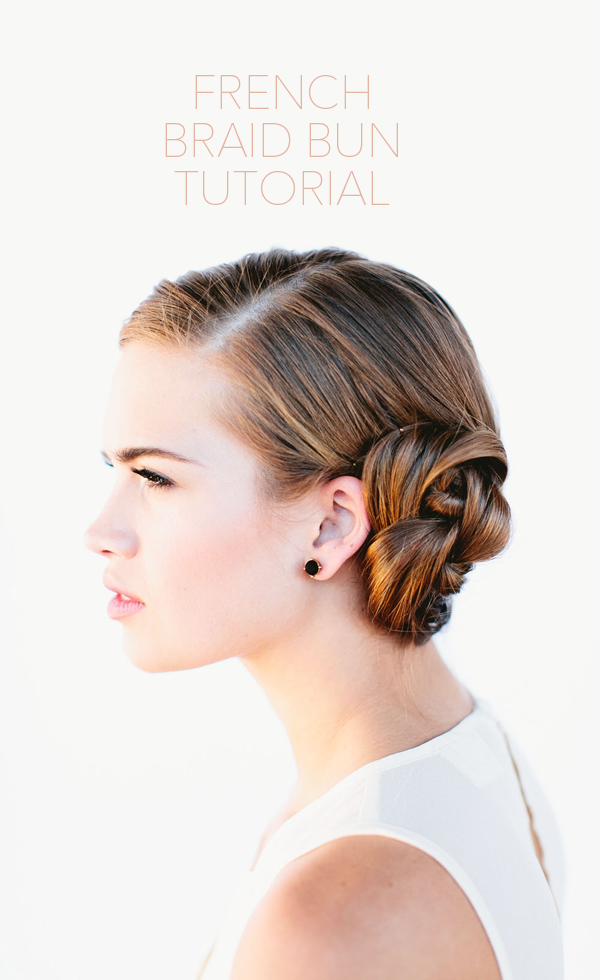
Today we have the second installment of our braid how-to series from Jesse Chamberlin, Alison Brislin, and Kelly Shew. This is a great variation of the french braid bun tutorial we posted last month. Alison suggested adorning your braided bun with sparkly pins, clips, or flowers to add a little special something to the look. Be sure to keep checking back as we have 2 more lovely tutorials coming to the blog later this month. Thanks for another wonderful tutorial, ladies!
Weding Updos for Long Hair Instructions
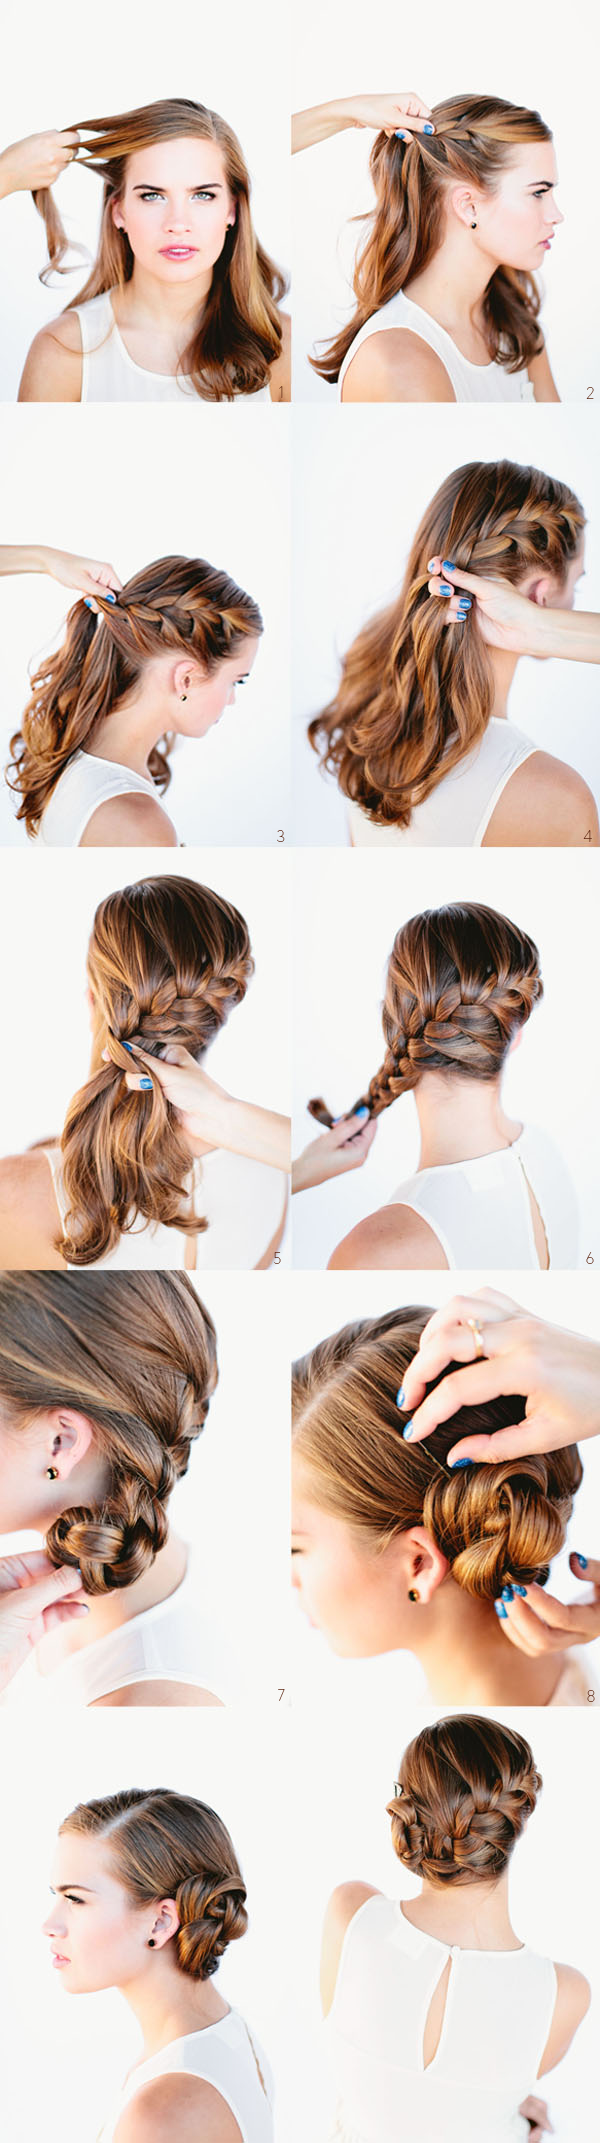
1. Part hair.
2. Grab a small section of hair.
3. & 4. Split into 3 parts.
5. Start French braiding, making sure to braid diagonally across the head.
6. Secure braid with a hair tie.
7. Roll the braid up and in, making a little bun.
8.Secure bun next to or above ear with Bobbi pins.
*Adorn braided bun with sparkly pins, clips, flowers, or whatever your heart desires.

Extra Tips
– You should brush your hair before braiding. Knots and tangles make it hard for the person braiding your hair. Might also hurt a little bit!
– Part on your natural side. Adjust instructions according to your part.
– Day old hair is best. A little grit is good for braids as they hold-up better. Clean hair is too slippery.
– These tutorials are written for someone to braid your hair, not intended for self-braiders. Unless you are really clever and talented!
Photography: Jesse of Our Labor of Love // Hair: Alison Brislin // Makeup: Kelly Shew