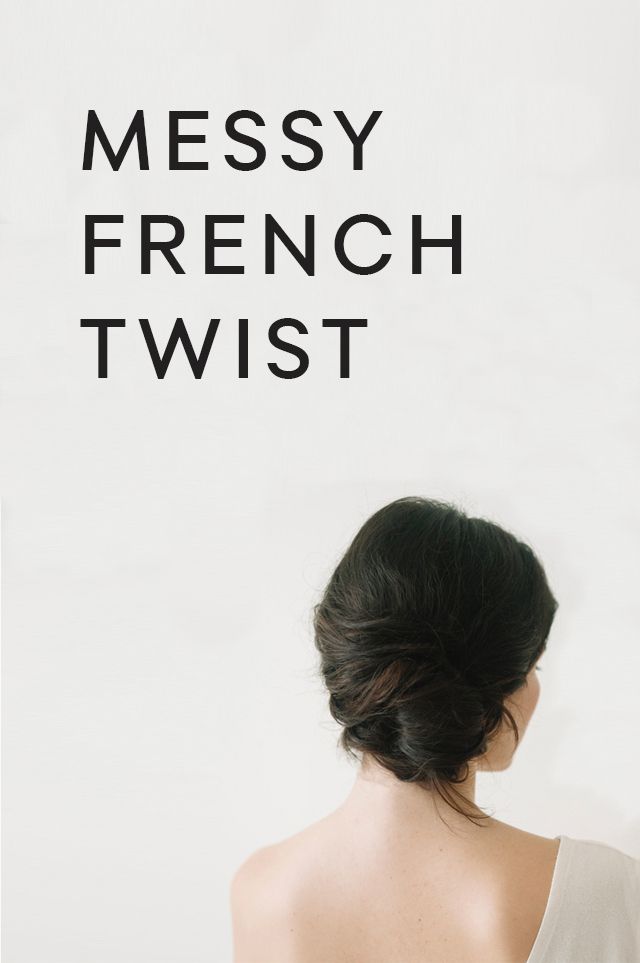

We love sharing beautiful, attainable hair and makeup tutorials with you. This messy side French twist is one of our new favorites! Simple to re-create with these detailed, step-by-step instructions, this look would be perfect for an organic wedding look, a bridal shower, or even a day at the office.
Steps:
1. This style works best with hair that has some wave or texture. If you have naturally wavy hair, you are good to go! If your hair is naturally straight, wrap different sized sections around a 1 ¼” curling iron to create some wave.
2. Mist a texturizing spray or surf spray through the hair to give it more “grip”. This will make styling the hair easier and help the finished look stay in place. Hair designer Claudia Mejerle used the Sea Salt Spray from Not Your Mother’s.
3. Back comb (or tease) the last few inches of your hair with a wide-toothed comb to give it even more texture and body – this makes it easier to pin the hair in place in the following steps.
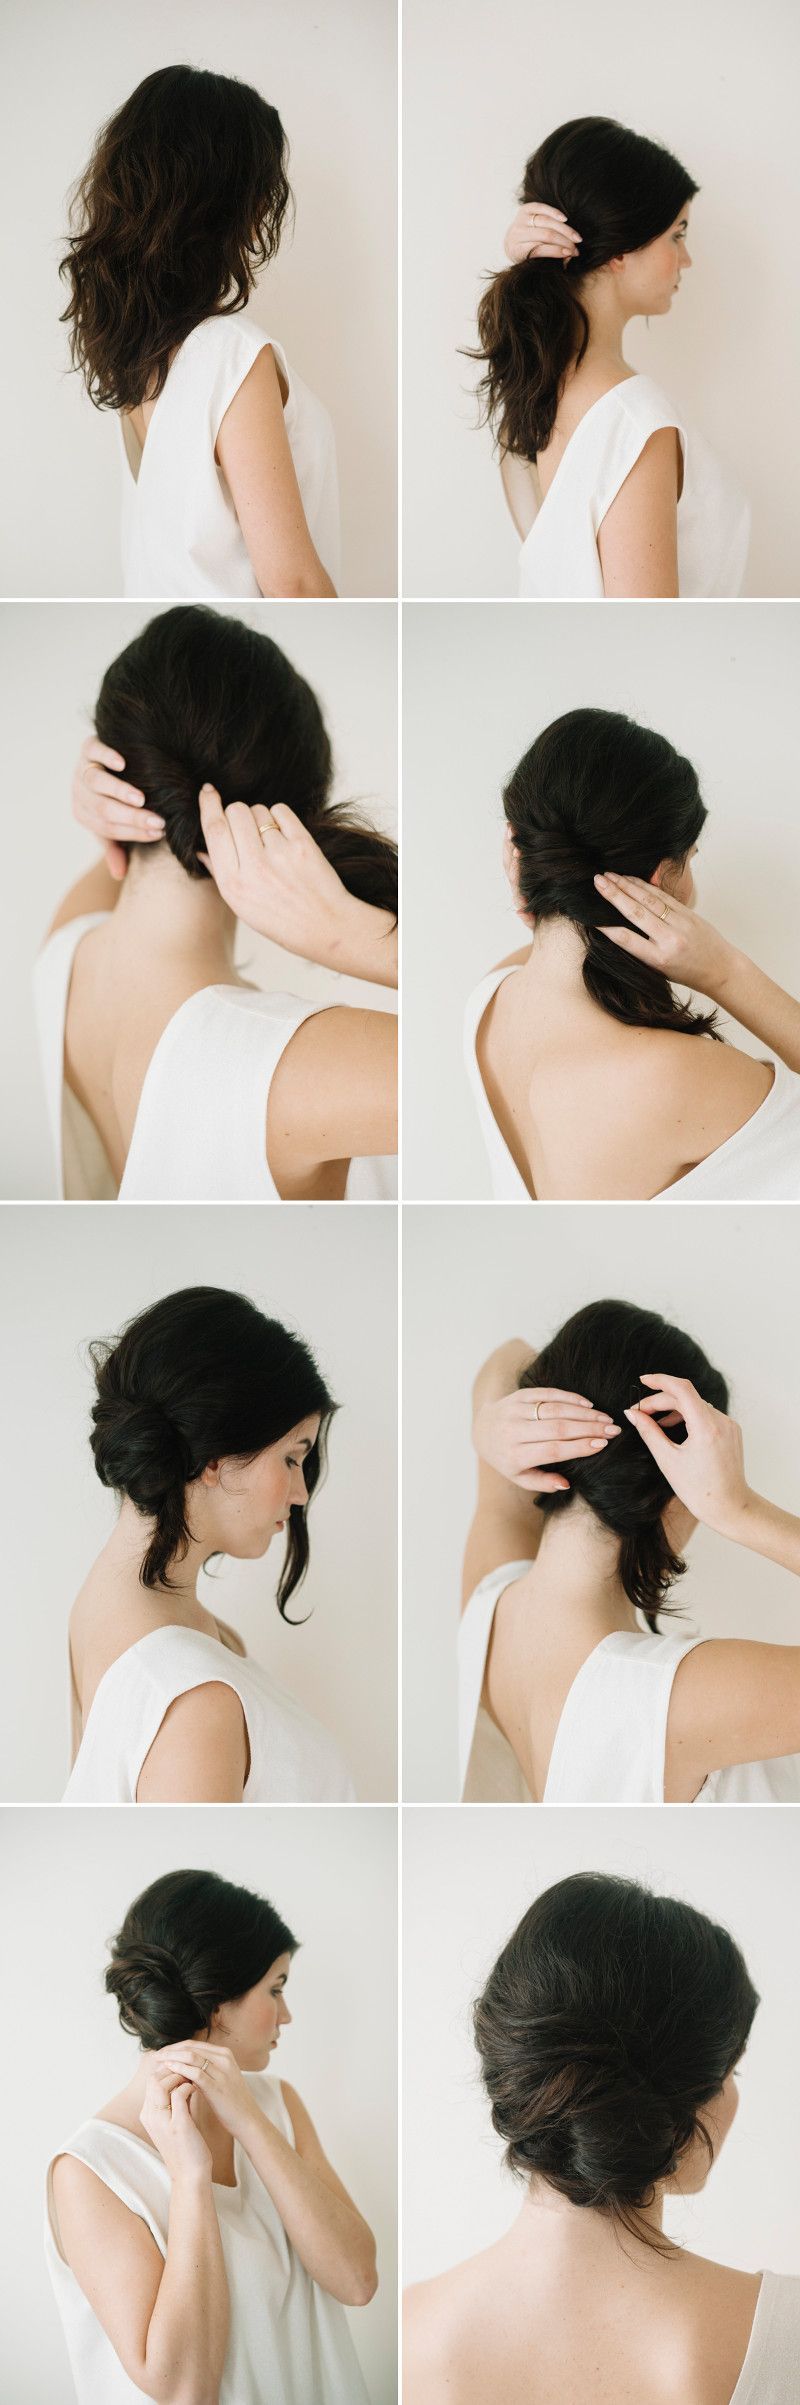
4. Part your hair wherever you feel is most flattering for your face. Either a side part or center part will work great. Then, gather all of the hair in a low ponytail with your hands.
5. Twist your ponytail toward the side of your head that you would like for the French twist to be situated. As you twist, tuck your hair into itself low on the head. This will start forming the French twist.

6. Pin the twisted hair in place with several hair pins and bobby pins.
7. Tuck the ends of the ponytail up into the twist and pin the ends into place. Feel free to leave some loose bits out to give the hair a soft, “lived in” feel.
8. Finish the style with a mist of hairspray. Mejerle used the Elnett Satin Hairspray Strong Hold.
Photography: Katie Hyatt for Laura Catherine Organic Photographs | Hair and Makeup: Claudia Mejerle | Model: Emily Cuppia | Top: Elizabeth Suzann