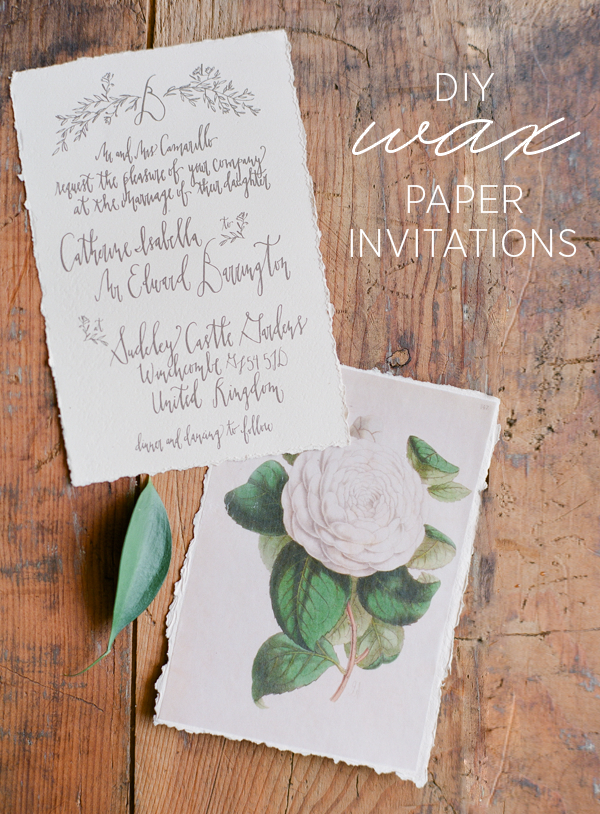
Today I have a beautiful tutorial for wax paper wedding invitations to share with you. Concepted and photographed by Katie Decker of Signora e Mare, this tutorial is a great way to add a little something extra to your invitations. Enjoy!
Tools and Supplies
hammer, wax candles or wax bead, paper of choice, image of choice printed on computer paper, extra computer paper, exacto knife or scissors, plastic bag (to place your candles in), glue stick, iron, bone folder or knife
Instructions
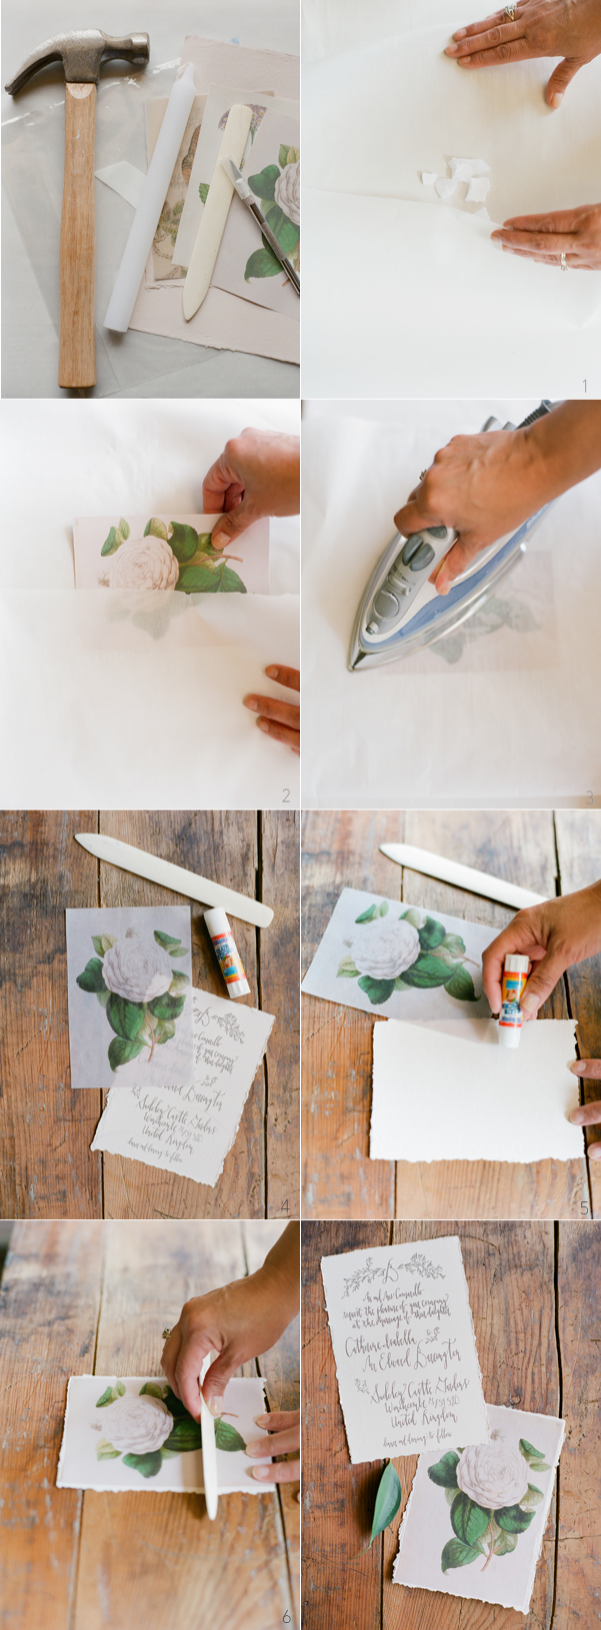
1. Begin by smashing your candle sticks (if you do not have wax beads) within the plastic bag. You’ll want to make sure these are small enough to melt down. One candlestick should be more than enough for a few of these.
2. Once you have your wax into small enough pieces, remove the wick and place the wax in between a fold piece of parchment paper. The paper should be large enough to completely sandwich your image .
3. Iron the wax so it is melted in between the sheets being careful not to spill the hot wax.
4. Next, place your selected image in between the parchment paper and completely ensconce the paper with the wax. Make sure to get ride of any bubbles.
5. With your image completely covered in wax, remove from the parchment paper and place in between two clean sheets of computer paper. Iron again to remove any excess wax.

6. Let completely dry and then adhere to your selected fine art paper with a glue stick.
7. Use the bone folder or smooth edge of a knife to adhere properly and remove any air bubbles.
Photography and Tutorial: Katie Decker of Signora e Mare
Be sure to check out Wedding Sparrow today to see the editorial inspired by this wax paper wedding invitation tutorial!