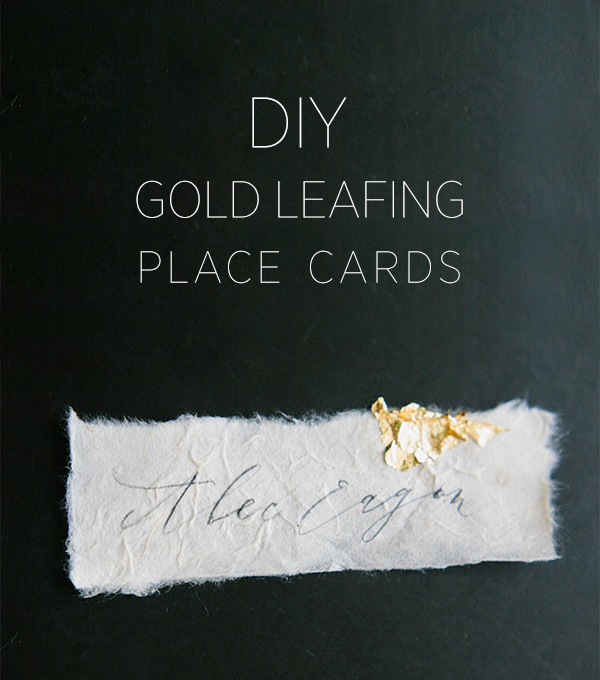
If we could rim everything in gold foil, we would. We simply adore the delicate and rich touch that gold foil adds to paper, and we loved these name cards that Meghan Kay Sadler created for our welcome dinner at the Erich McVey workshop. Keep reading for the full tutorial.
From Meghan:
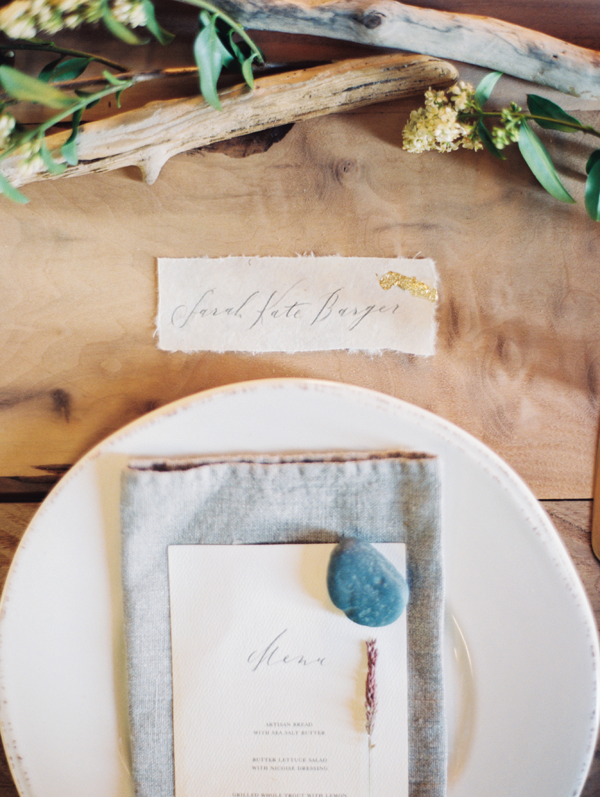
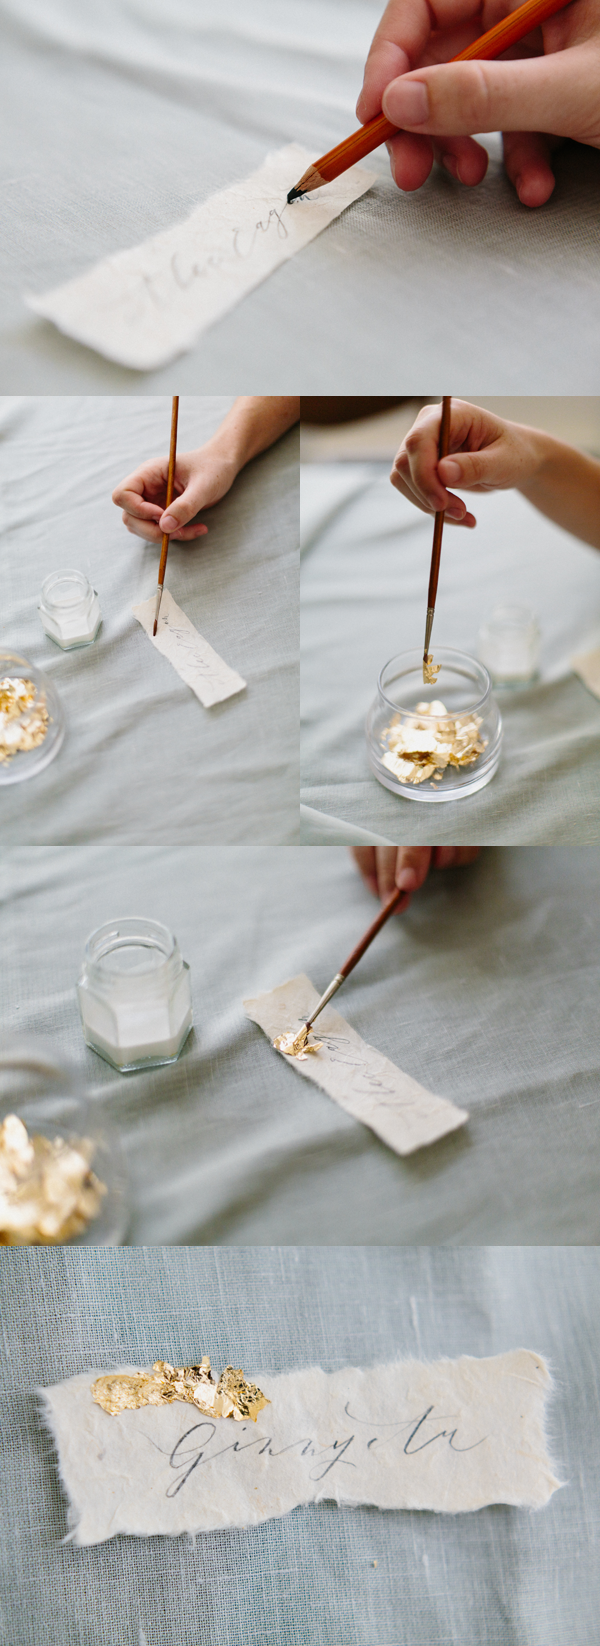
The layering of handmade paper with natural edges, charcoal writing, and organic gold leafing make these name cards a detailed gem to a simple tablescape. Instead of classic calligraphic ink writing, this name card is a bit more DIY friendly, since using a charcoal pencil is easier for a novice letterer, and you have the option of erasing.
Supplies (All found at Blick Art Supply Store)
–Handmade cream paper (Comes in large sheets)
–Charcoal pencil (Personally, I like General’s but any brand will do)
-Small paintbrush
-Erasure
-Pencil sharpener
Instructions
1) To maintain the natural edge of the paper fold a 1 inch strip back and forth until able to tear a relatively straight edge (add moisture on the edge if necessary).

2) Fold smaller sections back and forth to make 3-4in name cards. Don’t worry if the edges aren’t completely straight.
3) Using a regular pencil, lightly write out the name to make sure it fits properly.
4) Go over your writing with a sharpened charcoal pencil. Once you get a feel for the spacing you can just use the charcoal pencil. Be sure to keep the pencil sharp so you get the fine lines. To obtain a varying line weight, press a little harder on the downstroke of all your letters.
5) Dip your small paintbrush in the tacky glue and apply a light layer of glue where you’d like the leafing to be placed. Feel free to change up the placing to keep the cards looking organic.
6) While still in bag separate the sheets of gold leafing into smaller parts. Layout gold leafing in a flat jar or plate. Dip your brush into the gold leafing, place on the glue section of your name card. The leafing should stick to the paper, but you may need to help it lay flat with your hands. Apply until all the glue is covered, remove excess gold leafing.
Tutorial Photography, Styling for Tutorial, & Calligraphy: Meghan Kay Sadler | Table Image Styling: Ginny Au | Floral Design: Sarah Winward | Place Setting Image Photography: Erich McVey