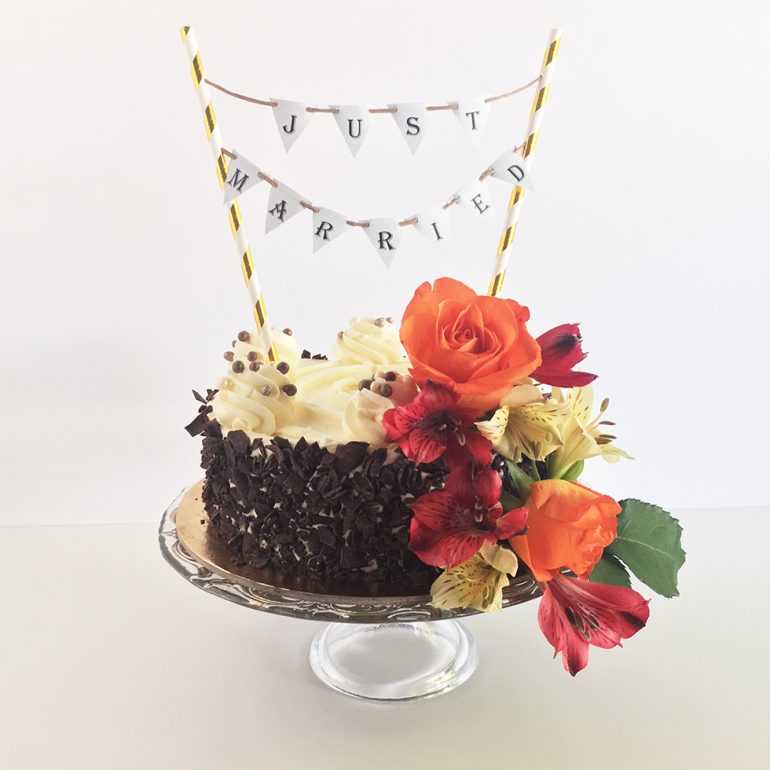
What wedding shower or wedding couldn’t use a touch of whimsy? A sweet handmade detail can add a wonderful zest to your décor, and delight your guests. Bunting banners have been a staple decoration in parties for decades.
Add this vintage detail to your wedding by creating a scaled-down version to fit on your cake. This is how-to recreate this classic concept and customize it so it is perfect for your big day.
What You Will Need
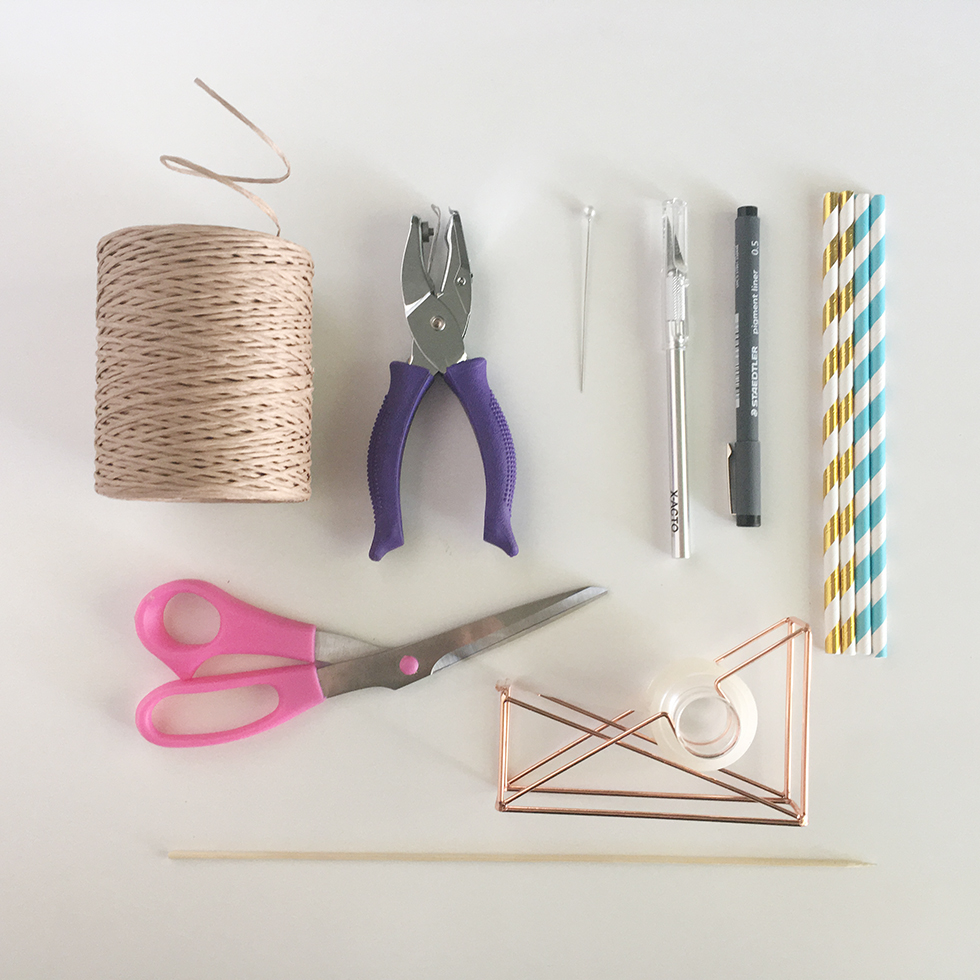
- Paper Straws (plain or colored)
- String
- 50 – 100lb Paper (Plain or Colored)
- Banner Template with the desired message
- Pen or Pencil
- Scissors or Cutting Blade
- Clear Scotch Tape
- Pin
- Wood Skewer stick
- Small hole punch 1/8 inch
Banner Types
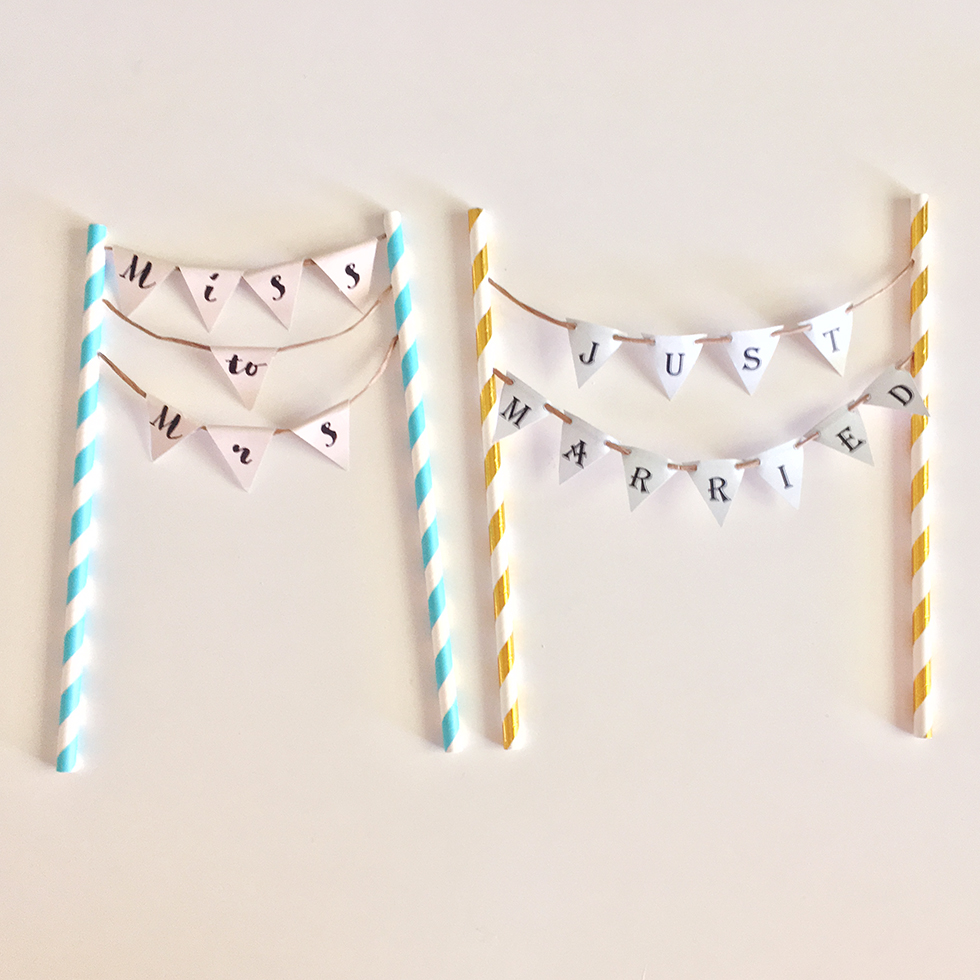
There are two ways we can create our banner, depending on how we would like the finished product to look. The folded banners float on the string and move around freely. The pierced flags are strung on and sit exactly where you place them.
Are you having an outdoor wedding? The fixed flags might be your best choice. Keep your wedding esthetic in mind and choose your style from there.
Using the Banner Template
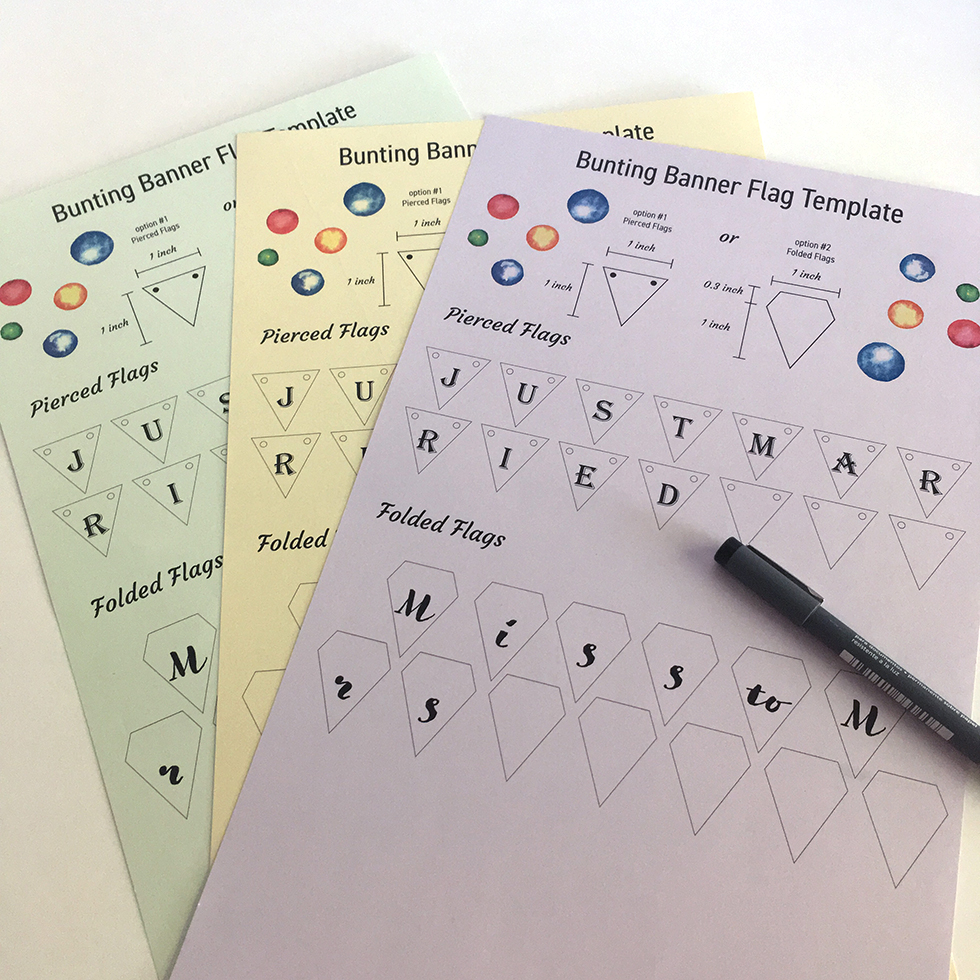
We have created a simple template for you to help create your perfect cake topper.
- If you are good with Adobe illustrator just fill in your message, letter by letter, in each flag using your font of choice.
- If not, use the flag template blank and you can hand draw in the letters after you print it.
Using a thicker paper gives the flags more durability and keeps them looking crisper. Using the template you can choose to create a pierced style banner or a folded banner. Depending on the length of your message, you could create a double, or triple layer of banners.
Download your copy of our Banner template.
Creating the Banner Poles
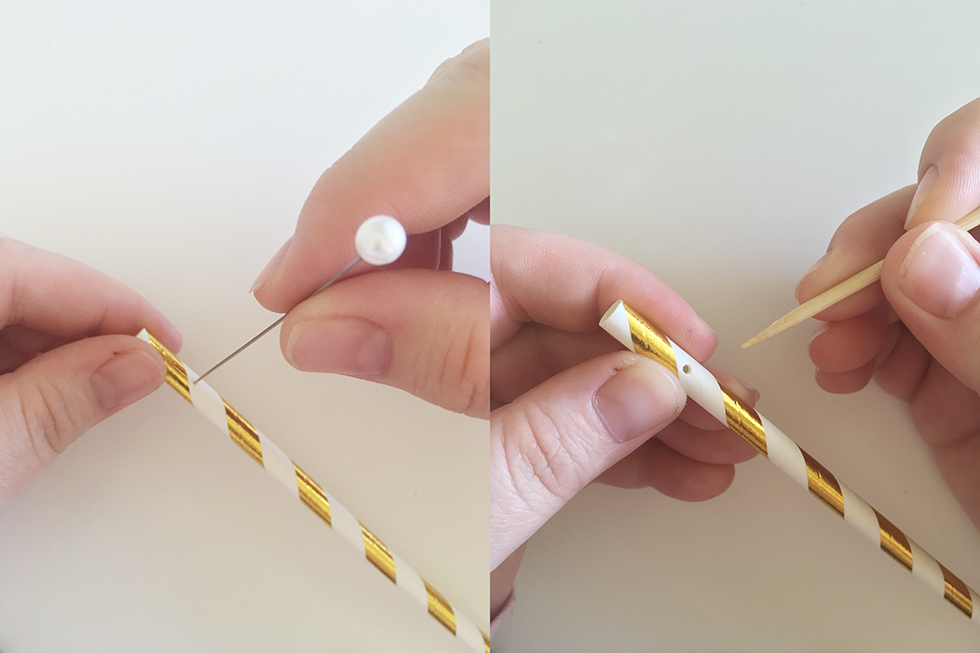
Take your paper straws and decide how far down from one end you would like your banner (or banners) to sit.
Mark the point with your pencil and use a pin to create a hole in the straw. Then use your wooden skewer to make the hole bigger to thread the string through.
Use your punched straws as a template for the straw on the other side so they are at the same height.
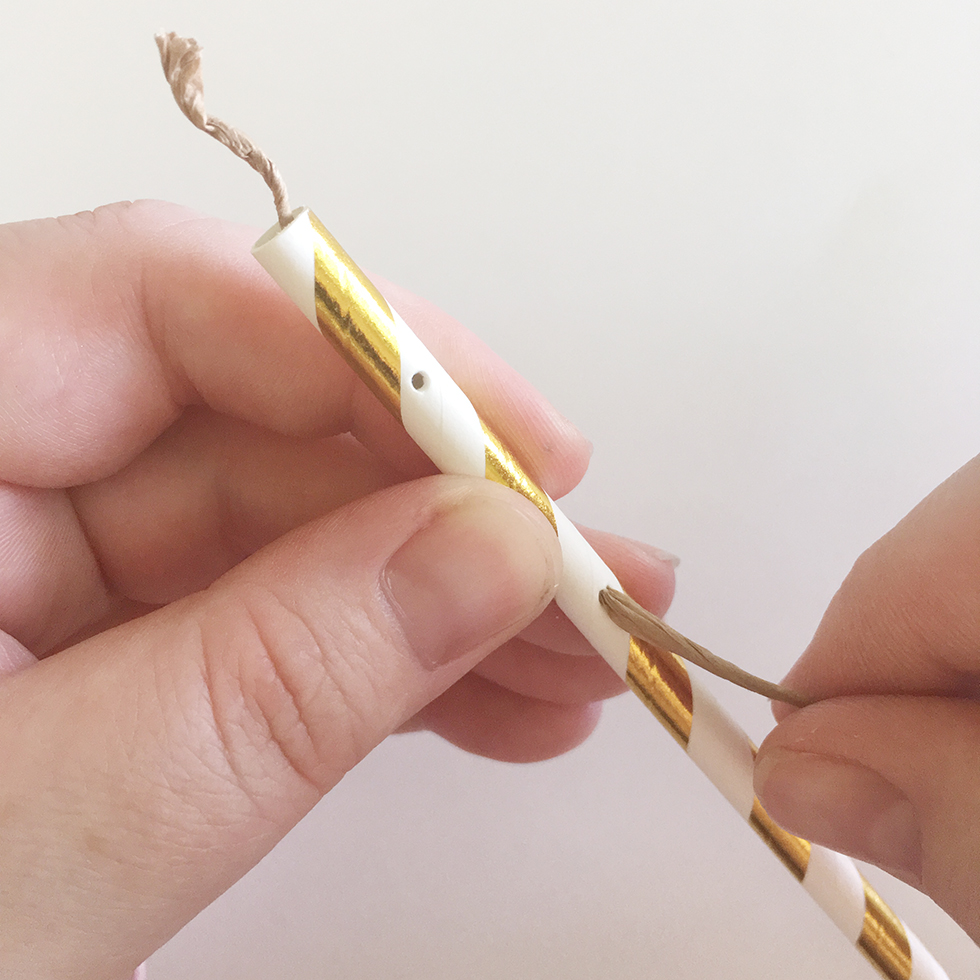
Thread the end of your string through the hole and out the top of your straw. Make sure you start the process from the bottom string to the top. That way your thread knots don’t get caught on each other.
Tie a knot on the end of the string when it pops out the top, then pull it back down into the straw. This will hold the banner up and hide the string!
Pierced Flags
Cut your flags out of the template using scissors or X-ACTO blade and poke out the hole with your hole punch.
Lay your cut out and shaped flags out in order in front of you. This will allow you to keep track of what flags go where, and it helps you know how many layers of string you need. It’s easiest to work from left to right.
Thread the flags along the string, with the middle section behind the flag.

Slide the flags in order onto your string to create your message.
Folded Flags
Cut your flags out of the template. Turn your flag face down on your work surface and at the fold line, place your BBQ skewer.
Fold over the small tab so the skewer is covered. Place a small piece of clear scotch tape on the fold, and press down over the skewer.
Gently remove the skewer from the flag (you may need to lightly twist it) and it should leave a perfectly sized opening for your string.
String the flags in order, just like the pierce flags.
Finish Your Banners
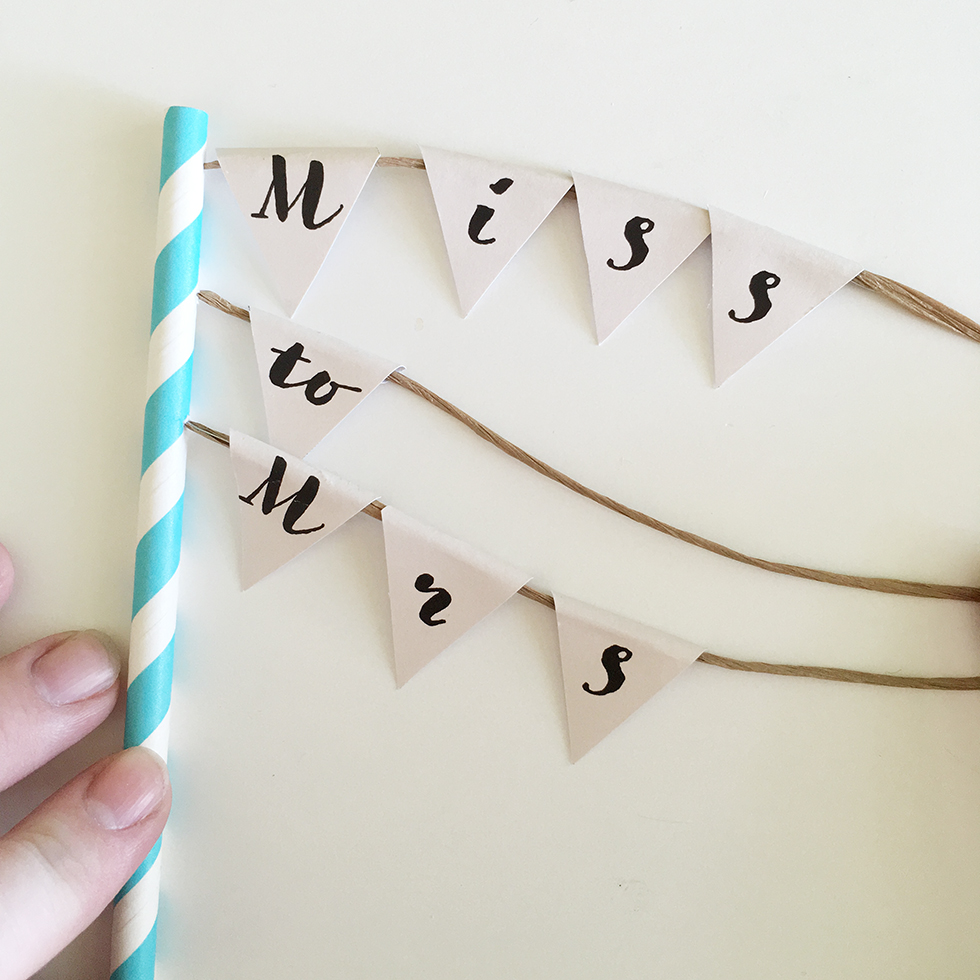
To finish the banners, thread the string inside the other pole, starting with the bottom string. Move all of your flags to one side so you can better string the pole, and have enough room to pull the string through the top and knot it.
This allows you to leave some space between the poles and the flags so that when you center them, they don’t look cramped. I like to leave a bit of slack in the string so they have that lovely drop to them.
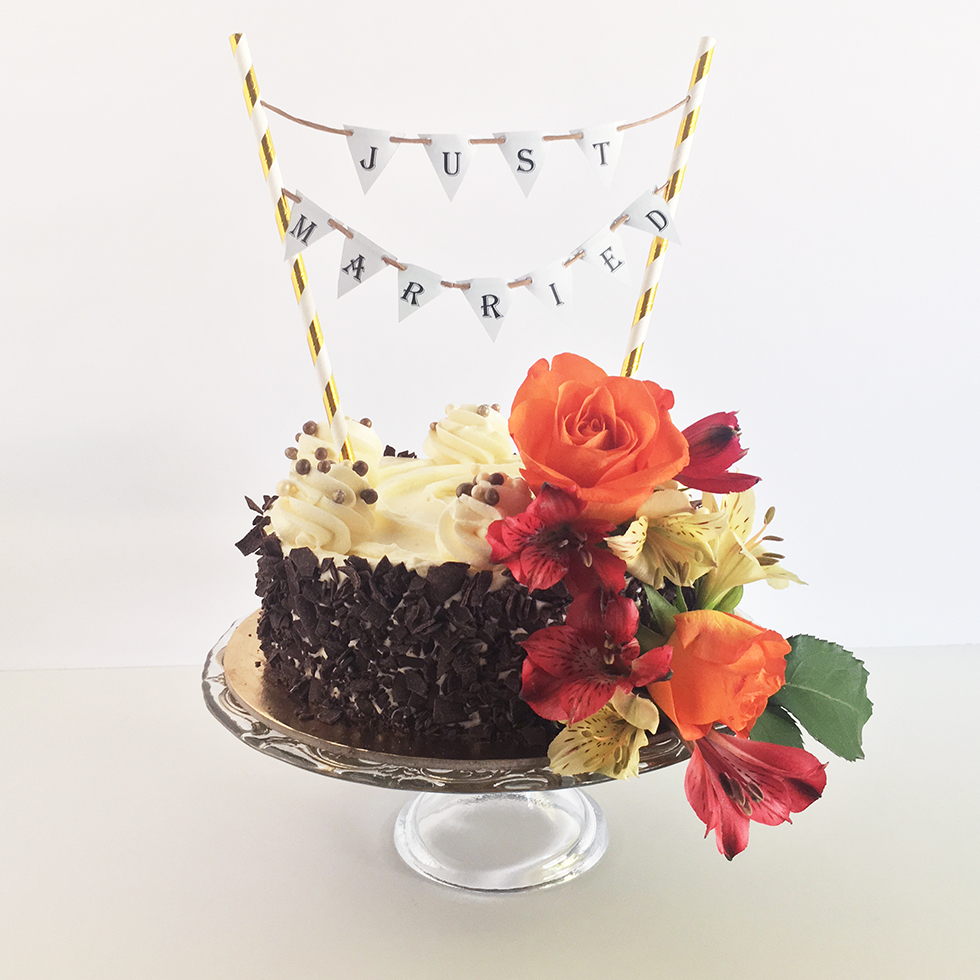
Once you finish stringing your banners and center your flags it’s ready to pop on a cake!