
Here is a really easy (cheater’s) way to get really aged looking flower pots without all the age!
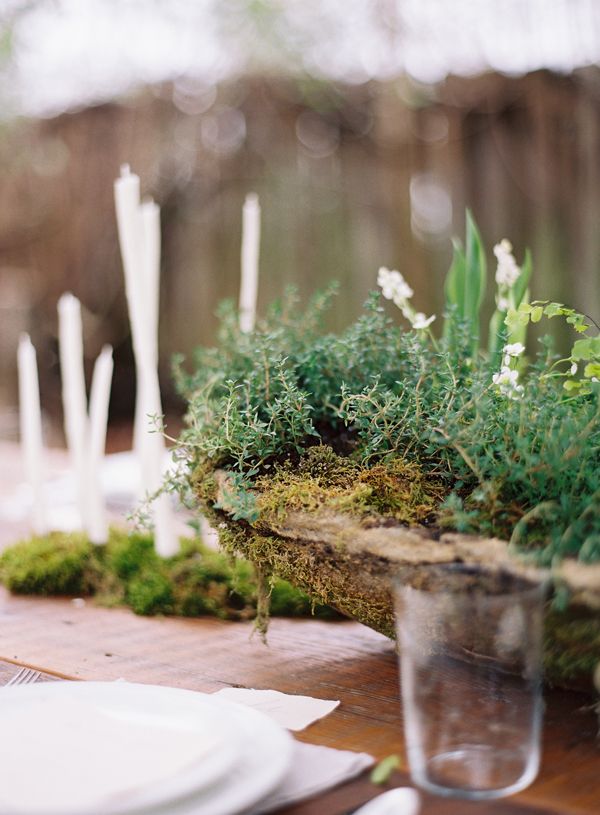
Months before my wedding, we had plans to hand make really organic hypertufa pots (natural, rock-like containers) for our centerpieces. We imagined planted flowers that grew between moss and cascaded over the tables.
As all weddings do, ours came quickly and 2 weeks before the date the pots still weren’t made. All hypertufa recipes online encouraged weeks and weeks of aging… and we didn’t have that. Brand new concrete is not what we had in mind, so we had to find a way to age the concrete pots. We threw the previous recipes out the window and started from scratch. My dad had been making his own natural looking pots for years (unbeknownst to me) so he showed me his own tricks.
And here is what he taught me…
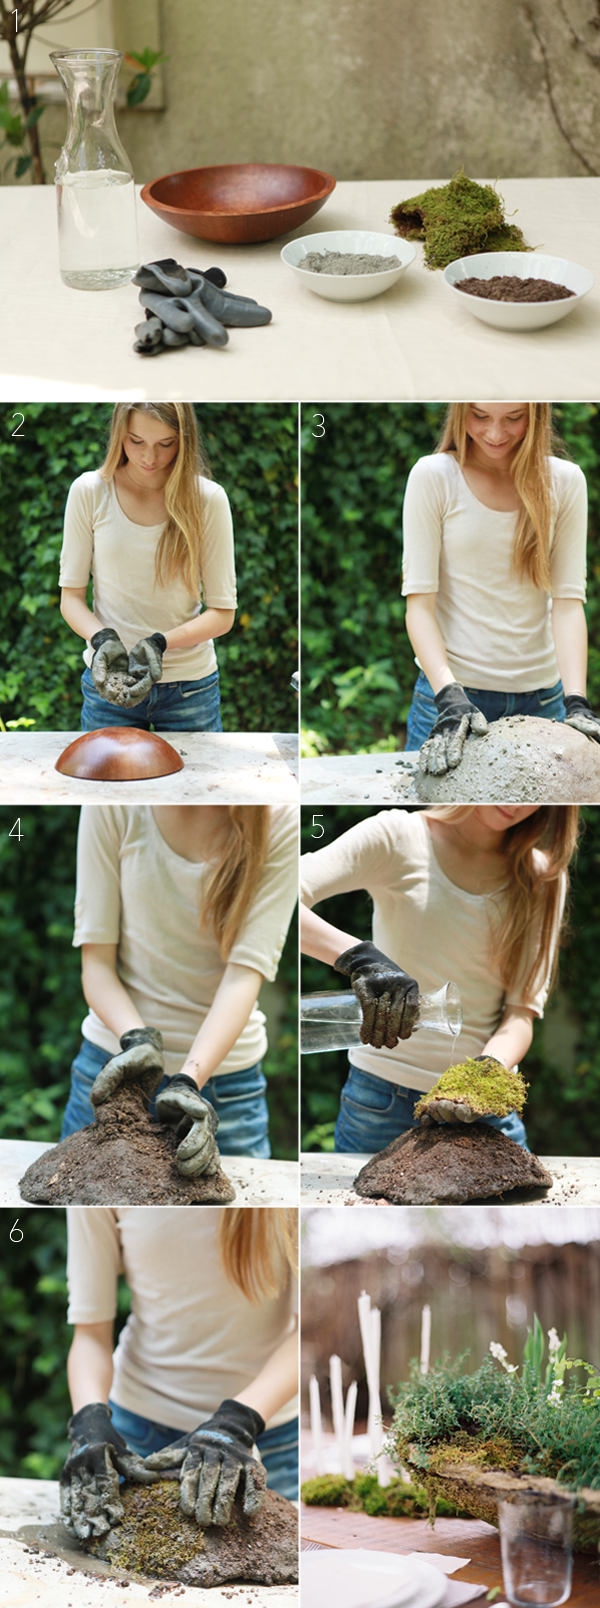
Supplies
Portland Cement (mixed according to directions on the bag)
Peat moss
Dried or fresh moss
A bowl or object to create a mold
Rubber working gloves
Water
Directions
1. Pour concrete over molding piece.
To allow the pot to mold really organically, avoiding straight lines or sharp edges, we put the molding piece only on the interior of the pot. This is unlike most tutorials which will encourage you to mold the exterior of your pot as well. This molding piece, which is more correctly only a ‘shaping’ piece, is placed on the table or ground and then poured onto with the concrete, to encourage your pot to shape naturally. This molding/shaping piece can be anything- an old bin, bowl, tub, pot…. Or for even more control of shape and size, you can create your shaping piece out of making a mound of wet sand (think building a sandcastle) then pour your concrete thickly over your sand mound. We did this to create our 3-foot long flower pot on your main dinner table, and it worked perfectly.
2. After pouring your concrete, make sure it’s plenty thick- otherwise it might crumble. Fill in any thinner spots with more concrete. At this point, also create a drainage hole by pushing your index finger into what will be the bottom of the mold, to allow drainage for your plants.

3. Heavily sprinkle peat moss over the concrete and massage it in. Sprinkle a second layer to really coat it.
4. Soak a small piece of moss with water the squeeze out the extra liquid.
5. Vigorously pat the small piece of moss onto your wet concrete pot. Make sure your moss is gripping onto your concrete and will be able to hold onto it once its dry. The concrete will start to soak through the moss– this is a good thing. You want it to hold nicely. From here, you can add more moss randomly around your pot & even add small pebbles or other natural textures.
6. Let sit for about 3 days.
Top Image: Tec Petaja