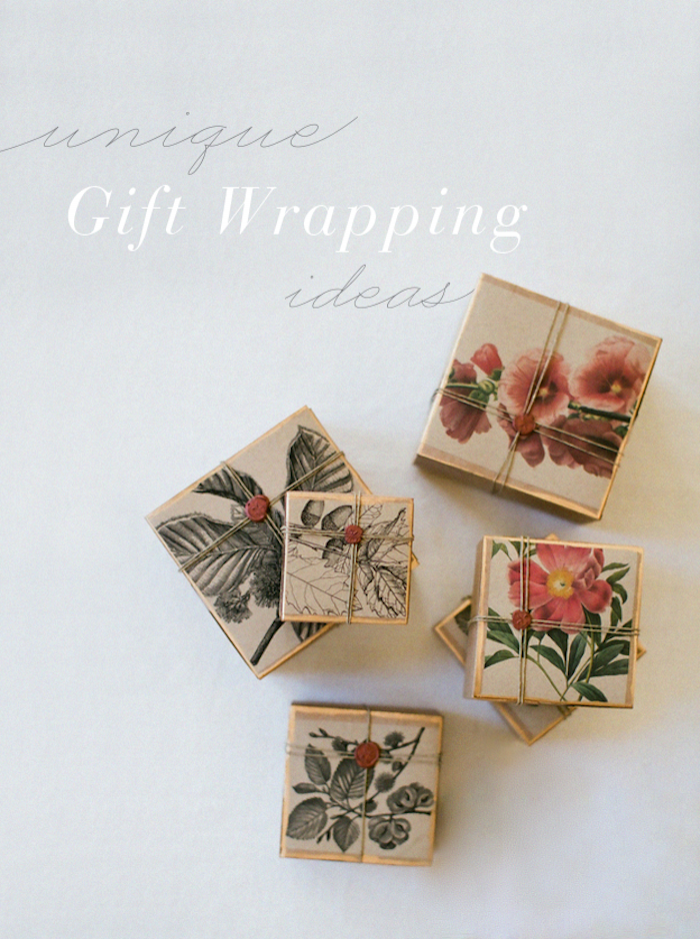
It’s finally the holiday season, and with Christmas just a few weeks away, it’s time to start thinking about presents and wrapping! We loved working with Simone LeBlanc and Nancy Neil to create this elegant and unique DIY wrapping tutorial for you. Keep reading to find out more about Simone’s inspiration and for the full supply list and step-by-step tutorial!
From Simone LeBlanc:
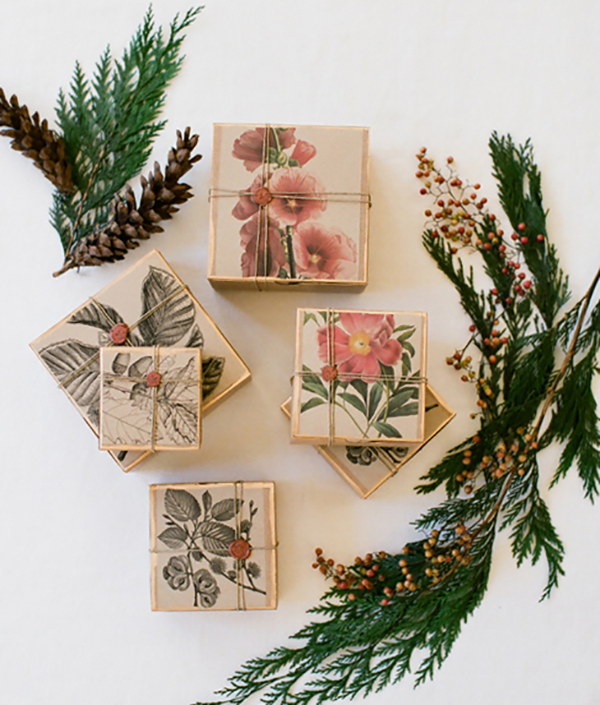
I was inspired by old-world flora etchings and watercolors for this holiday DIY wrapping project. By using simple hand-made details such as a color printer, a touch of holiday shine and a few finishing touches, we turned the basic, ready-made kraft box into an elevated, elegant holiday wrapping collection.

Supplies:
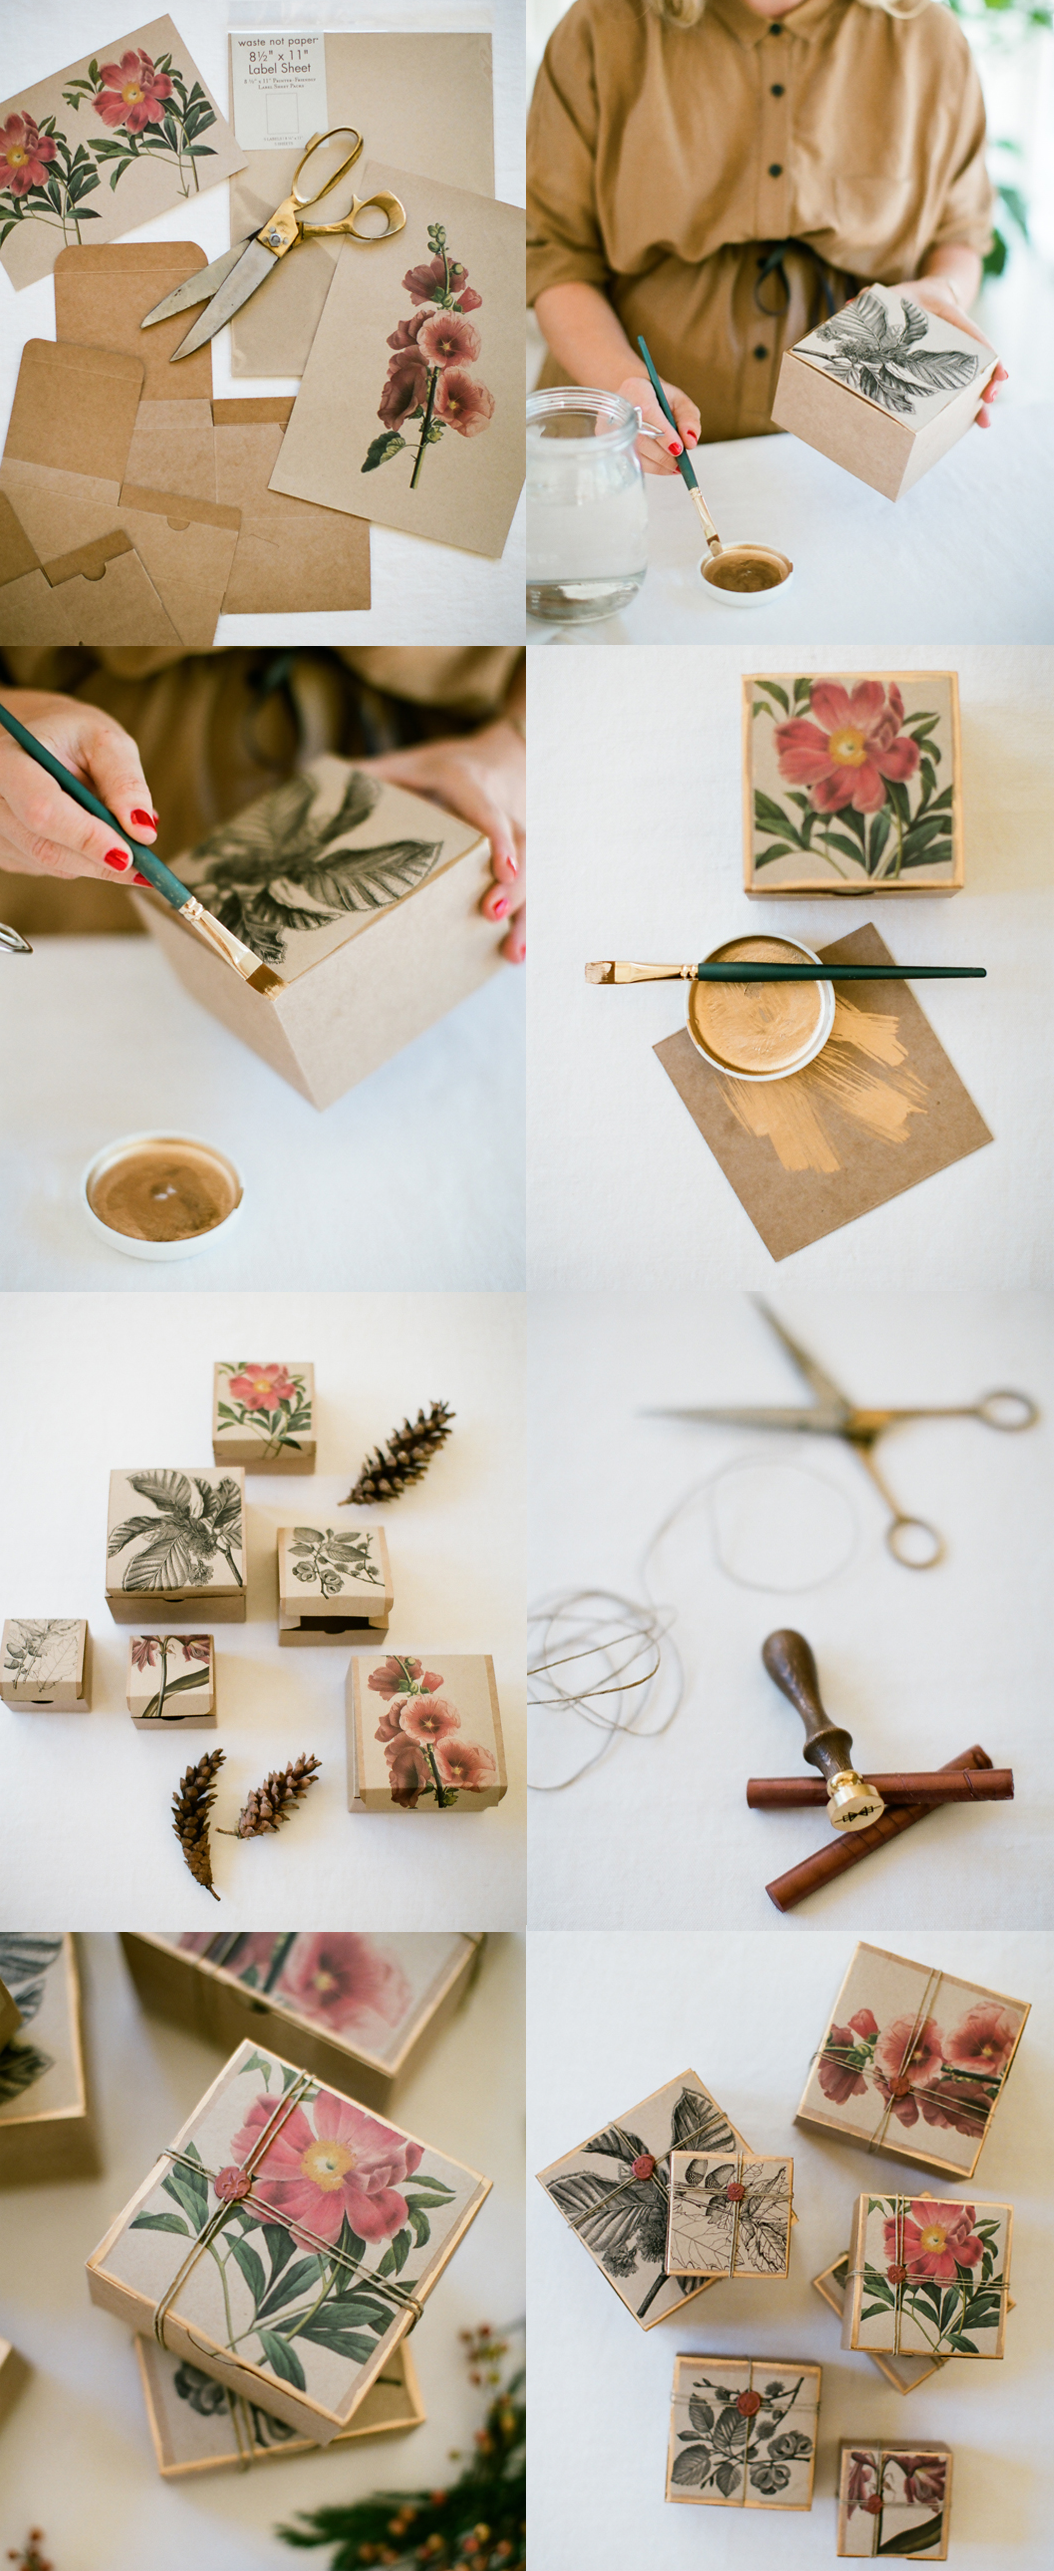
1. Flora Fauna Images: Choose seasonal images with an antique feel in both black and white and color. I selected these greenery and flower images from Dover Pictur.
2. Kraft Label Paper: Paper Bag from Paper Source is the perfect kraft color. I love the full sheet label size as it’s so easy to print.
3. Kraft Boxes: Choose a few different sizes depending on the size of your various gifts. I like these from Paper Mart as they are affordable and versatile.
4. Sumi Paint: This paint is a more natural metallic and gives a beautiful luminescence when it’s painted on kraft. I bought this set at my local Blick.
5. Flat Paintbrush: Any kind of small brush will do.
6. Hemp Twine: For tying around your boxes (found here).
7. Wax Seal and Sealing Wax: Use a pre-designed seal or create your own. You can do both at Letter Seals. Bronze or copper sealing wax pairs really nicely with this color palette.

Instructions:
1. Print your flora and fauna images in different sizes on the kraft label paper.
2. Trim them to your box sizes and adhere to box tops, making sure to not seal the boxes shut when you do.
3. For an added touch of holiday sparkle, paint the edges of the box lightly with sumi paint. Don’t worry about being perfect here, just give it enough coverage to add some shine.
4. Pack up your box with it’s intended gift and when you’re ready to seal it up simply wrap your hemp twine around the box, twice in each direction.
5. Then seal at the cross point with your wax seal. Your gift is ready for giving!
Tutorial by: Simone LeBlanc | Photography: Nancy Neil