
Last December, Joy called to see if I could help with a super secret project. She asked me to create an oyster shell garland. I was intrigued. She didn’t give me any specifics on the design, except that it should be about 6 feet long and would be used as a table runner. We made arrangements for me to pick up the shells from Emily and with about a week to turn the project around, I started developing a plan.
Emily purchased the oyster shells off ebay. I’m not sure of the cost, but I picked up about 15 boxes that contained about 20 – 25 shells each. The shells were clean and varied in size. At one point Joy asked me if they smelled bad – they didn’t at all! Some of the shells had been tinted green from seaweed on the outer part of the shell and I that I thought looked really pretty. The inside of each shell had a purplish-brown spot. A few of the shells were chipped, but most were in great condition. The more I worked with them, the more I appreciated how beautiful they were.
I went to Home Depot to purchase a length of chain to use as a base instead. I ended up buying white plastic chain instead of a heavy metal chain because I remembered how heavy the shells were in the boxes. I also picked up a pack of drill bits and some fishing line. I didn’t want any hardware to be noticeable and take away from the design. I actually used two packs of drill bits in the process – the shells are extremely hard and durable. Historically in the low country, oyster shells were used to make “tabby”, a hard, concrete like mixture used to make driveways and plaster the exterior of homes. After I decided how I wanted to proceed, I sweet-talked my sweet hubby into helping. This definitely is not a one person job! – Jeannine of Honeysuckle Wedding Company

Equipment/Supply list:
- One heavy duty drill – you will need a 3/8 – ½ horsepower drill.
- One to two packs of drill bits. These sell for about $10 – $15 each pack, depending on the brand of drill you have. The bits will break and you will need to replace them. We went through two packs of bits for drilling a little over 100 shells.
- Heavy Weight Fishing Line
- Scissors
- Newspaper
- Shallow bucket or tray to hold water
- Wood block
- Plastic chain in desired length (I used white)
- Pliers
- Work gloves (while drilling)
- Safety goggles (while drilling)
1. First, we found an old ice cream bucket to hold water for the drilling. If you have ever cut ceramic tile before, this process will seem familiar to you. You have to drill under water, or the friction is just too much for the drill and the bits. We used a scrap piece of wood as a base to sit the shell on. You will press down hard during drilling and when you suddenly break though, you need something to protect your bucket and your work surface.

2. I chose to drill into the “top” of the shell so that the prettier, scalloped edge faced out from the chain. Once my hubby had 20 or so shells drilled, I started tying them to the chain while he continued drilling. We watched a lot of TV while we worked
3. Using the fishing line, I tied each shell to a link of chain, pulling the shell right up against the link as I tied a knot three or four times. Then I snipped the extra line, leaving about ½ inch so the line didn’t come untied. I almost used white yarn for this project, but I don’t think it would have been sturdy enough and it wouldn’t have had the invisible quality that the fishing line has. You do have to know each time about 3 – 4 times, though or they will come untied.
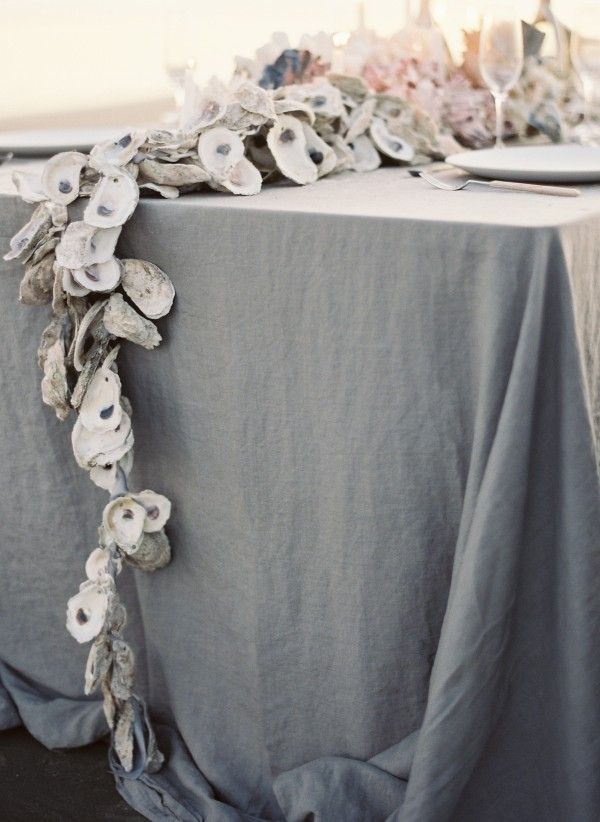
4. I worked down the length of chain once, then twice, then three times, each time filling in anywhere there was a gap in the chain. I alternated the placement of the shells, tying some with the inside of the shell facing up, and some with the outside facing up. The chain and fishing line makes the entire garland adjustable.
DIY by Honeysuckle Wedding Company // Illustration by Hannah Lee