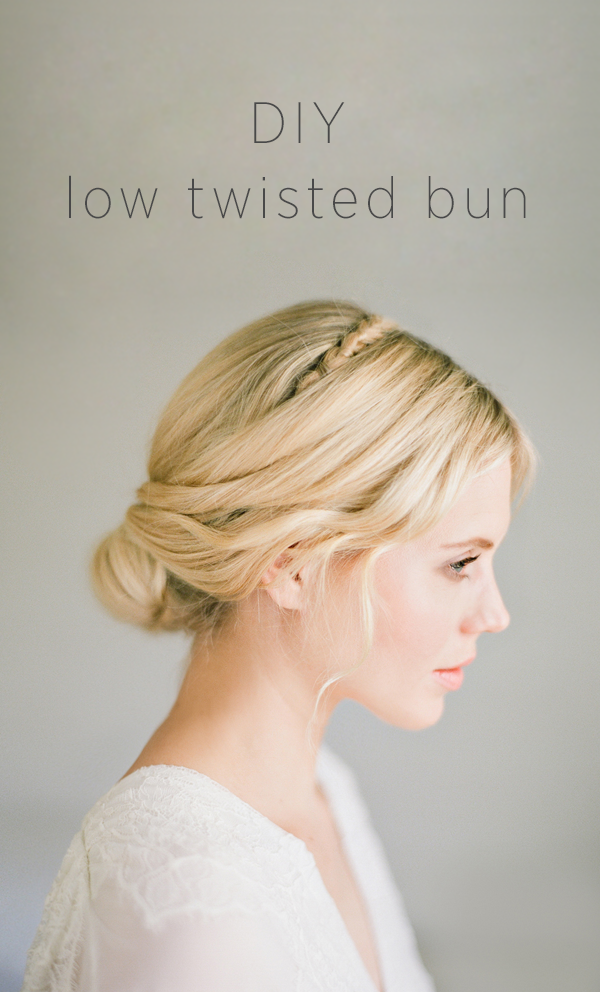
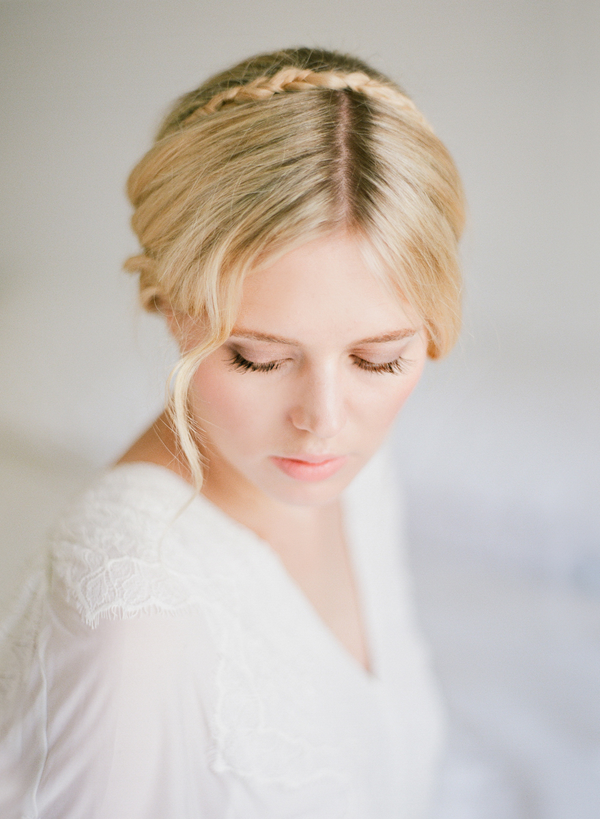
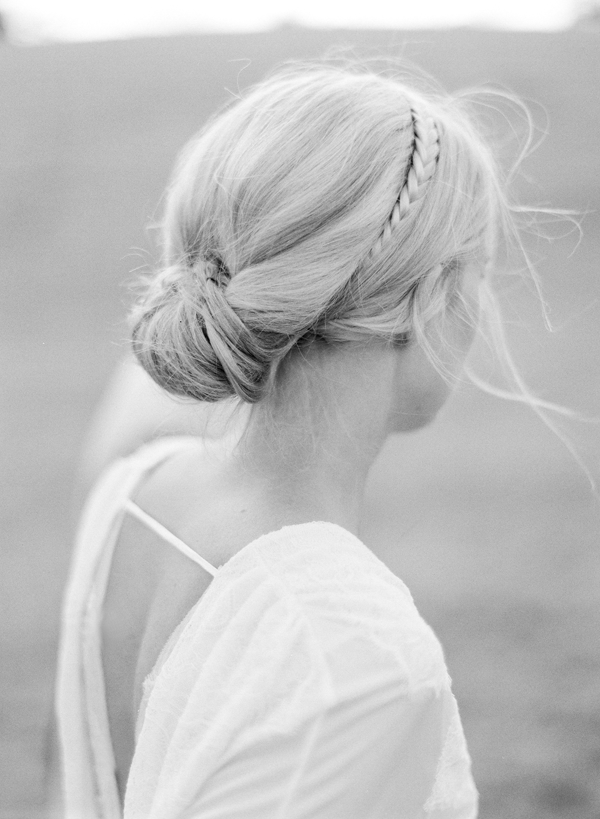
In August, we featured Jemma Keech’s absolutely breathtaking engagement session with Jose Villa, and we fell in love with her lovely twisted bun hairstyle. We loved it so much that we asked her to show us how to do it! Jemma worked with her future sister-in-law, Hannah, to show us the step-by-step instructions. Keep reading for the full tutorial!
Instructions:
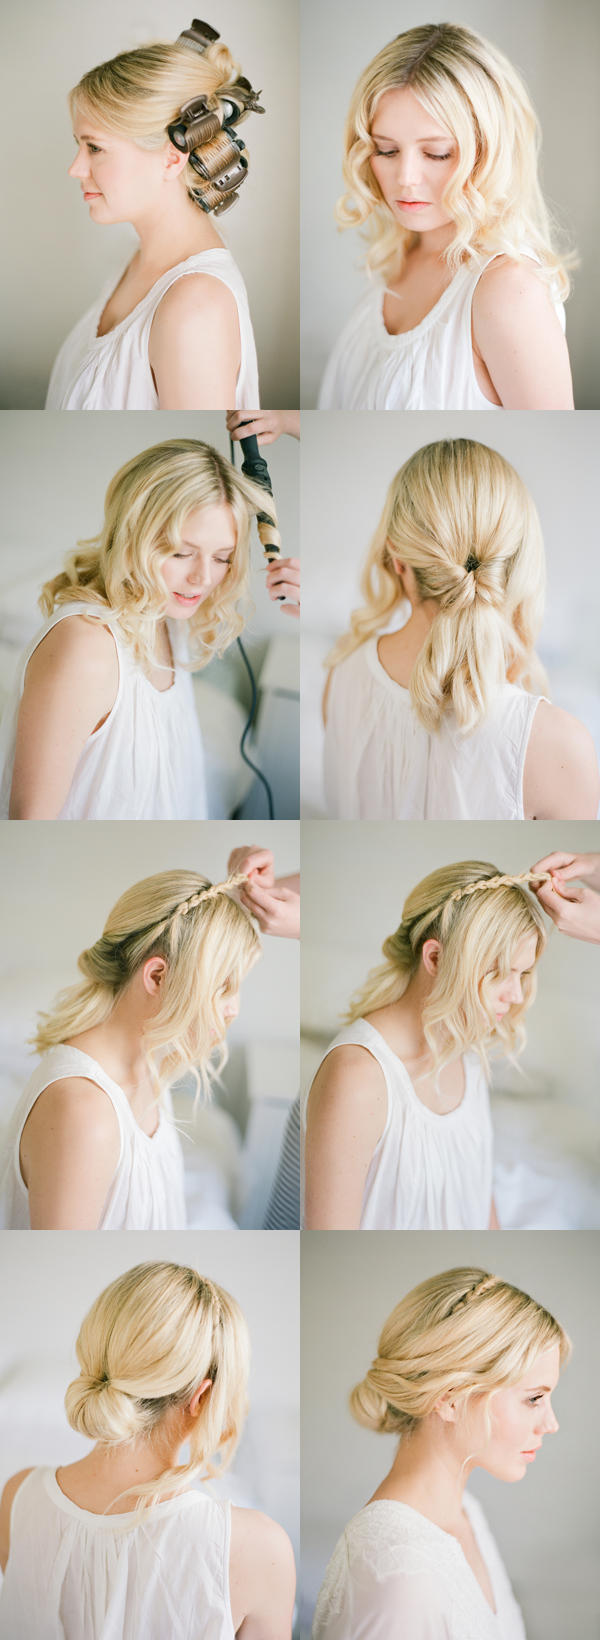
1. Place hair in hot rollers and wait approximately 15 mins.
2. Take out the rollers, and if required, use a curling wand to add some extra curl to the front sections.
3. Gently brush out curls with a soft paddle brush, parting the hair in the middle or on its natural side.
4. Divide the hair into 3 main sections – 2 smaller front sections (one on each side of the face) and place the larger back section into a low, loose pony tail.
5. Create a hole just above the hair tie and loop the pony tail over, through the hole.
6. Take a small piece of hair from one of the small front sections (either on the right or left side) and plait/ braid it up and over the head. Secure this with a bobby pin behind the opposite ear.
7. Go back to the looped pony tail and now proceed to loop the rest of the hair through the hole, repeat this step securing the hair with pins until a bun is created.
8. Finally loosely pin back the front sections of hair into the bun. Take care to gently do this so as not to loose the curl and also to cover the base of the plait.
Tutorial and color Photography: Jemma Keech | Black and White Photography: Jose Villa | Hair: Hannah Winter | Model: Sancia Warner