
I have always dreamed of having Moon Pies for favors at my wedding! The novelty treat is something I grew up with in the South and there is just something so fun about them, not to mention that they have such an endearing name. To dress up these tasty and inexpensive treats, I will show you how to personalize them and to repackage them to make them look as good as they taste. The Moon Pies could always be swapped out for your own favorite prepackaged treat, or even a home made whoopie pie. Click “more” below to see the rest…


Materials & Tools
-Royal Icing (I found a good recipe here: http://www.foodnetwork.com/recipes/alton-brown/royal-icing-recipe/index.html)
-Moon Pies, can be found in a variety of flavors, shapes and sizes here: http://www.moonpie.com/home.asp
-Rubber spatula
-Icing bag or a parchment paper square 9×9 “ or larger, folded into triangle
-Icing tip # 3
-Craft paper or recycled paper grocery sacks
-Crystal clear cellophane bags/envelopes, 3 ½”x 5 1/8” for mini moon pies
-Glue Stick
-Corner rounder
-Bone folder
-Exacto knife
-Cutting Mat
-Ruler
-Scissors
-Date stamp
-Ink pad

Step 1: If you don’t have an icing bag and want to learn how to make one yourself, start here (otherwise jump ahead to step 6): Note that the points of the triangle have been marked. Place the triangle on a flat surface with point “b” facing you.

Step 2: Roll point “a” up and under towards you, until points a & b meet.
Step 3: Hold points a & b together and with your other hand bring point c around until it meets with points a & b in back. A cone should form, tighten the cone by moving points a & c closer together.

Step 4: Tape parchment in place once a a sharp cone is formed.
Step 5: Trim about ¾” off of the tip of cone, then slide piping tip in to set into the opening.
Step 6: Fill bag half way with icing, becareful not to overfill. Icing should be at room temperature, not too stiff and not too runny. The consistency of elmer’s white glue is perfect.

Step 7: Roll piping bag down, and begin icing by practicing the initial on excess paper or parchment.
Step 8: Pipe initials onto chilled Moon Pies, then allow to sit for 20 – 30 minutes for icing to dry completely. Drying time may vary, depending on the humidity and climate.

Step 9: Once the icing is dry, carefully slide Moon Pies into cellophane bags.
Step 10: Fold bags about one inch down, and seal.


Step 11: Trim craft paper to 3 ½ x 4” pieces.
Step 12: Fold pieces in half, making them 1 ¼ x 4” tabs.
Step 13: Using a corner rounder, round the edges of the open side of the paper tab for a finished look.

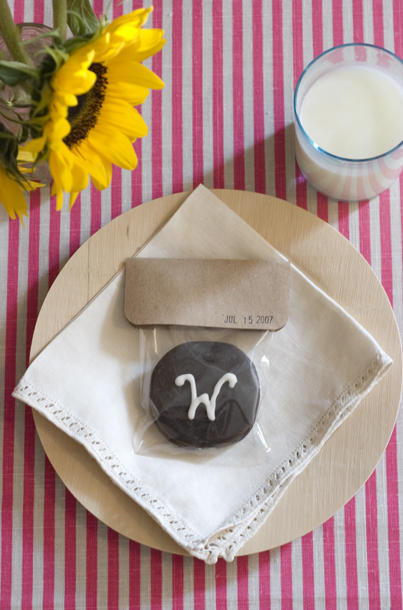
Steps 14 & 15: Stamp date of Marriage onto the front of the brown tabs using a date stamp that can be found at any office suply store.

Step 16 & 17: Glue tab over the top of packaged Moon Pies, hiding the fold and seal of the cellophane bag and your favors are complete.
Project created by Haylie Bird Waring